#Day48:-ECS
Today will be a great learning for sure. I know many of you may not know about the term "ECS". As you know, 90 Days Of DevOps Challenge is mostly about 'learning new' , let's learn then ;)
What is ECS ?
- ECS (Elastic Container Service) is a fully-managed container orchestration service provided by Amazon Web Services (AWS). It allows you to run and manage Docker containers on a cluster of virtual machines (EC2 instances) without having to manage the underlying infrastructure.
With ECS, you can easily deploy, manage, and scale your containerized applications using the AWS Management Console, the AWS CLI, or the API. ECS supports both "Fargate" and "EC2 launch types", which means you can run your containers on AWS-managed infrastructure or your own EC2 instances.
ECS also integrates with other AWS services, such as Elastic Load Balancing, Auto Scaling, and Amazon VPC, allowing you to build scalable and highly available applications. Additionally, ECS has support for Docker Compose and Kubernetes, making it easy to adopt existing container workflows.
Overall, ECS is a powerful and flexible container orchestration service that can help simplify the deployment and management of containerized applications in AWS.
Difference between EKS and ECS ?
- EKS (Elastic Kubernetes Service) and ECS (Elastic Container Service) are both container orchestration platforms provided by Amazon Web Services (AWS). While both platforms allow you to run containerized applications in the AWS cloud, there are some differences between the two.
Architecture: ECS is based on a centralized architecture, where there is a control plane that manages the scheduling of containers on EC2 instances. On the other hand, EKS is based on a distributed architecture, where the Kubernetes control plane is distributed across multiple EC2 instances.
Kubernetes Support: EKS is a fully managed Kubernetes service, meaning that it supports Kubernetes natively and allows you to run your Kubernetes workloads on AWS without having to manage the Kubernetes control plane. ECS, on the other hand, has its own orchestration engine and does not support Kubernetes natively.
Scaling: EKS is designed to automatically scale your Kubernetes cluster based on demand, whereas ECS requires you to configure scaling policies for your tasks and services.
Flexibility: EKS provides more flexibility than ECS in terms of container orchestration, as it allows you to customize and configure Kubernetes to meet your specific requirements. ECS is more restrictive in terms of the options available for container orchestration.
Community: Kubernetes has a large and active open-source community, which means that EKS benefits from a wide range of community-driven development and support. ECS, on the other hand, has a smaller community and is largely driven by AWS itself.
In summary, EKS is a good choice if you want to use Kubernetes to manage your containerized workloads on AWS, while ECS is a good choice if you want a simpler, more managed platform for running your containerized applications.
Steps:-
- Login to aws account with valid credentials. Search “ECS” in the search box and click on it.

2. ECS homescreen will open and click on “Create cluster”.

3. Enter mandatory details like cluster name.

4. Click on “Create”.

5. Your cluster will be ceated successfully and will be displayed.

6. On left hand side of the panel, Click on “Task definitions”.

7. Click on “Create new task definition” button. A dropdown will open and click on “Create new task definition”.

8. Enter mandatory details like Task definition family name, container name. For entering “Image URL”, open a new tab in your internet browser. Enter web url as “gallery.ecr.aws”.

9. Search for Nginx image by typing Nginx in search box.
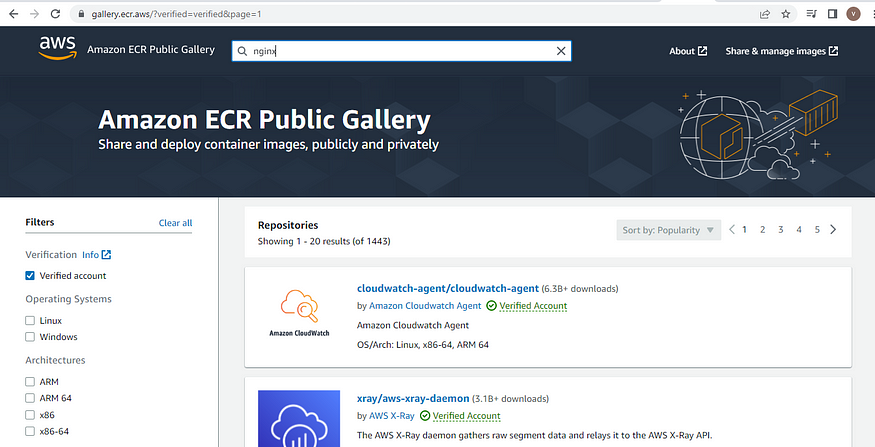
10. Click on Nginx image.

11. Click on “Copy” button.

12. The link will be copied.

13. Go back to your Task definitions and enter copied URL in “Image URL” text box.

14. Click on “Next”.

15. Select “AWS Fargate(serverless)” form “App environment” dropdown.

16. Select CPU as “.5 vCPU” and Memory as “1GB”

17. Click on “Next”.

18. Click on “Create”.

19. Your Task definition will be created successfully and will be visible.

20. Go to cluster. Click on the cluster made by you.

21. Click on “Create” to create service for deploying your nginx webpage.

22. Select “Service”.

23. Click on “Family” and select task definition family created by you.

24. Click on “Networking”.

25. Choose “Create a new security group”

26. Enter “Security group name” , “Security group description”. Add an inbound rule as given below in the screenshot.
Note:- Turned on should be enabled.

27. Click on “Create”.

28.Your service will be deployed successfully.
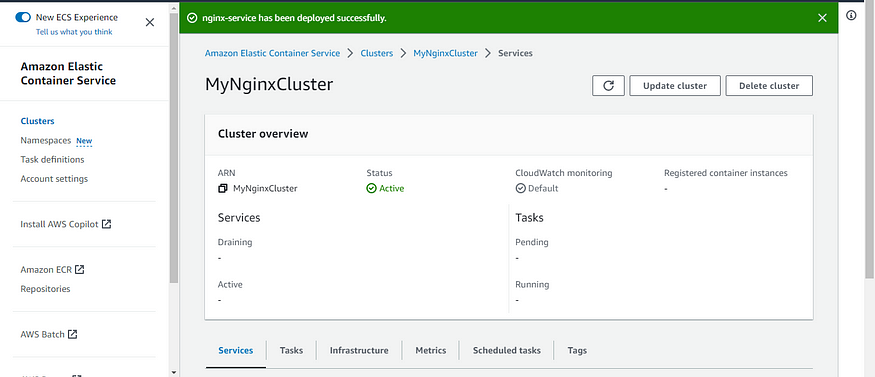
29. Click on your created task.

30. Click on “open address”.

31. Your Nginx webpage will be up and running.
